Stampin' Up! Independent Demonstrator
Showing posts with label Exploding Box. Show all posts

Sunday, December 1, 2013

Finally

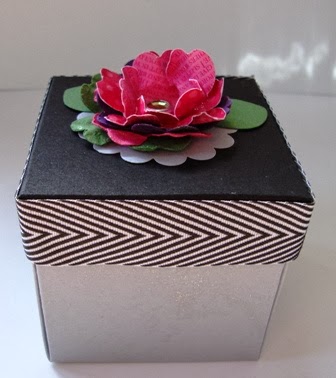
I made an exploding box to hold a gift card for my son's girlfriend's birthday.  I finally was able to give it to her yesterday.  I also carved a stamp of their French bulldog puppy for her.

First, the stamp.  I made the box to hold the stamp and a black stampin' spot (ink pad) for her.  I love the new Undefined Stamp Carving Kit.  It takes a little practice, but I was able to make the stamp to look like their new puppy.


Here's a better picture of what I carved:


I also made Alicia an exploding box.  On one side, I put a card that had the months and days so I could mark her birthday.  I had each of the fours sides of the outside of the box decorated different from one another.


Of course, when you open the box, it "explodes" open.  I had a gift card standing up in the middle.


I've had fun making and giving these exploding boxes. 

Supplies used:
Cardstock:  12" x 12" Cherry Cobbler, Basic Black
Ribbon:  Cherry Cobbler 1" Stitched Edge Grosgrain Ribbon
Stamp Sets:  Six-Sided Sampler, Chalk Talk, Bring on the Cake, Yippee-Skippee!
Misc:  Rhinestone Basic Jewels


Monday, November 11, 2013

Exploding with Candy

I'm teaching a stamp class for a woman's group tonight, and I have two members of the group who will be my assistants since it's a large group.  To thank them, I've made them each an exploding box with peppermint candy inside.  Here's the outside.


The top of the box is so simple yet pretty that I took a photo of it, too.


When the lid is lifted off, the sides fall open.  The weight of the candies make the sides fall right down.  


Supplies Used:
Stamp set:  Best of Christmas
Stamp pad:  Cherry Cobbler
Paper:  Gold and Silver Foil Sheets, Cherry Cobbler cardstock, Season of Style Designer Series Paper, Whisper White cardstock
Embellishment:  Frosted Finishes Embellishments
Punches used:  Large Oval, Scallop Oval, Christmas Ornament Punch
I used  glue dots to hold the candy onto the sides.  I used the Stampin' Trimmer Small Scallop Rotary Cutting Blade on the corner pieces so it gives those corners a pretty edge.

I so loved how this box turned out that we made them at my downline meeting on Friday, too.  There's something about silver and gold together that just makes me happy.


Saturday, November 2, 2013

Exploding Birthday Card/Box

Hi,

I made this card for my friend (and coworker), but I wanted to wait until I gave it to her before I posted it.  I spritzed sparkle on the sides of the box--maybe you can see it in the picture below.


When she removed the lid, the box opened.  There is a pumpkin standing up in the center because her birthday is on Halloween.


The other side of the pumpkin is a flower.  I avoided the traditional Halloween look for her card this year.


I will be making this exploding box with my downline this coming week.  We'll also make the exploding box I posted on my blog on August 25 (or click here).

Thanks for looking.
Tina


Sunday, August 25, 2013

Gift Card Box

My exercise teacher celebrates Hanukkah, so I wanted to make her something to hold a gift card.  Hanukkah is at the end of November this year, but it's nice to have things done early -- at least in my little world.  The box I came up with uses the textured 12" x 12" cardstock in Island Indigo and Smoky Slate from the holiday catalog.


 I found many online tutorials on how to make the box, and I combined elements from several of them as well as adding my own touch.  Below is a picture of the top of the box.

See that curly clear ribbon?  Well, it's not ribbon.  It's that plastic strip that Stampin' Up! has around the ribbon to hold it in place.  I cut off the ends and curled it and used it to jazz up the top of the package.


When you open the box, the four sides fall open as pictured below.  The center holds a gift card.  I downloaded clip art for the pictures and typed some Happy Hanukkah sayings and printed these four things on our whisper white card stock. 


I used the new envelope punch board to make the gift card holder that stands up in the center of the gift.  The Festive Flurry stamp set and dies were used for the snowflake on the front of the card as well as on the front of the gift card holder.

Card stock:  textured 12" x 12" cardstock in Island Indigo and Smoky Slate, Whisper White, Bermuda Bay, Smoky Slate
DSP:  Winter Frost Specialty Designer Series Paper
Stamps:  Festive Flurry 
FrameLits:  Labels Collection, Festive Flurry
Embossing Folders:  Stylish Stripes Textured Impressions Embossing Folder
Punches:  Blossom (used to make the flower on top of the package)
Ribbon:  Okay, I admit I used a retired product here.  The ribbon that was perfect was from Sale-a-bration.  The color was just right--Island Indigo--and it was just what I needed.
Other:  Rhinestone Basic Jewels (in center of snowflake on the inside of package), brad (I used a retired brad for the center of the flower.)
Snowflake Info:  I used Iridescent Ice embossing powder on vellum to emboss the snowflake inside the box.  I used white craft ink to stamp the snowflake on the outside of the box.  I then took each of those snowflakes and mounted them on cardstock that I had also cut out.

My supply list ran long on this one.  If you've read this far, wow, I'm surprised (and thrilled)! 

I have a feeling my exercise teacher will love this gift card holder.  I'll bet she'll reuse it for a gift card for her daughter.  She did that last year, and the card holder I made wasn't as fun as this one.