Stampin' Up! Independent Demonstrator

Sunday, December 29, 2013

Little Shop of Horrors

No, my blog post title isn't describing my stamping room.  I am referring to the play Little Shop of Horrors.  It's coming to Seattle in March and we bought tickets to it for my daughter for a birthday gift.  I made the card below for her, too.  Now, if you've never seen the play or movie, the card will not make much sense.  But she knew immediately that it was Audrey 2, the carnivorous plant in the play.

I must give credit to Amy Downing for the basic design.  I saw her card and used it to make my own version.  Amy's website is at http://amyzingcards.blogspot.com/, but she never did post a picture of her card on her blog.  Thank you, Amy, for the inspiration!

And, just in case you're worried ;-) that I spoiled the birthday surprise for my daughter (since her birthday is in January), I already gave her the card and had her choose the date she could make it to the play.  I even had a leaf poking out of the back of the envelope to give a hint of what was inside.

I also wrote a poem for the inside the card based on the play's theme song, Suddenly Seymour.  It was hokey but cute.

FYI, Little Shop of Horrors is a fun movie, too.  It stars Rick Moranis and also has Steve Martin, John Candy, James Belushi, Christopher Guest, Bill Murray, and Ellen Greene.

Happy New Year.


Monday, December 23, 2013

Gift Bags Galore

At my last downline meeting, we made gift bags using the Envelope Punch Board.  Then, we made bows using the envelope punch board, too.  I tell you, I use that envelope punch board a lot!

Below is a picture of one of the bags we made in class.  I normally would put a tag on it to hang down the front, but this one is going in a Christmas stocking, so I left the tag off.


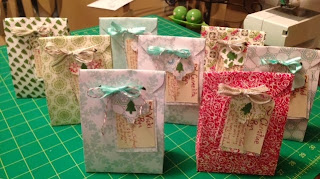
My friend Ryn was in the class, and she went home and made several (well, it looks like she made at least eight) of the bags.  She punched holes and tied ribbons for the bows, and look how cute her bags are!  Thanks, Ryn, for sending me the photo of your bags so I could share it.  The tag hanging down looks great, too.


Merry Christmas.


Monday, December 9, 2013

Pop-Up Tree Card

For anyone who really knows me, you know I hate fussy-cutting.  However, I will do it when there's a card I absolutely love.  I found the pop-up Christmas tree card directions at http://extremecards.blogspot.com/ and want to thank Carol at Extreme Cards and Papercrafting for sharing her projects and patterns.  The pattern and instructions are at http://extremecards.blogspot.com/2011/12/3d-christmas-tree-pop-up-card-tutorial.html .

The front of the card looks like a regular Christmas card.  I used Stampin' Up! products to make the card front.  The card pictured below was made for Judy (my neighbor and my downline).


Once opened, the card pops to life with a three-dimensional tree.  This inside pop-up is what I learned how to make using the pattern provided by extremecards.blogspot.com.  Cute, eh? 


Here's a picture of another card I made for Sandy, another member of my downline:


These cards were fun to make and even more fun for folks to receive.  Check out extreme cards website.  It's great.

Supplies Used:

Cardstock:  Island Indigo, Night of Navy, Whisper White, and Silver Foil Sheet
Stamp Sets:  Christmas Messages, More Merry Messages
Framelits:  Festive Flurry Framelits Dies
Other:  Glitter Paper

Tina


Sunday, December 1, 2013

Finally

I made an exploding box to hold a gift card for my son's girlfriend's birthday.  I finally was able to give it to her yesterday.  I also carved a stamp of their French bulldog puppy for her.

First, the stamp.  I made the box to hold the stamp and a black stampin' spot (ink pad) for her.  I love the new Undefined Stamp Carving Kit.  It takes a little practice, but I was able to make the stamp to look like their new puppy.


Here's a better picture of what I carved:


I also made Alicia an exploding box.  On one side, I put a card that had the months and days so I could mark her birthday.  I had each of the fours sides of the outside of the box decorated different from one another.


Of course, when you open the box, it "explodes" open.  I had a gift card standing up in the middle.


I've had fun making and giving these exploding boxes. 

Supplies used:
Cardstock:  12" x 12" Cherry Cobbler, Basic Black
Ribbon:  Cherry Cobbler 1" Stitched Edge Grosgrain Ribbon
Stamp Sets:  Six-Sided Sampler, Chalk Talk, Bring on the Cake, Yippee-Skippee!
Misc:  Rhinestone Basic Jewels